Last week, I mentioned that I was challenging myself to declutter 100 things from my house, by my parents' Thanksgiving visit. Rather than one big purge, I've been adding to the stash consistently a little each day. I didn't think it would be too hard, and it wasn't. In fact, I'm guessing I could easily get rid of twice as much if I wanted - so that might be a goal for another time.
Everything is packed up and in the back of my car, ready to be dropped off at the thrift store this afternoon. Here's the complete list:
3 paintings
2 pairs of shoes
8 bags
2 boxes
2 sets of cards
7 holiday decorations
1 roll of ribbon
1 floor square
1 drying rack
1 easel
1 small filing cabinet
1 miscellaneous wall decoration
1 big lint roller
1 file holder
4 bowls
1 terrarium
1 hanging basket
6 vases
1 basket
1 candle plate
scrap fabric
1 curtain rod
2 plates
11 shirts
7 towels
4 skirts
3 leashes
1 dog collar
6 books
1 scarf
1 wristband
1 pan set
2 pans
2 baking dishes
2 measuring cups
3 sets oven mitts
3 picture frames
1 bucket
1 thermos
1 pillowcase
3 bead cases
Total: 103

ethan's wall art.
My friends Bethany and James adopted their little boy, Ethan, last spring. I knew I wanted to make them something as a gift, but sometimes it takes me a while to come up with an idea I really like.
Then I saw this saying on an art print (I can't remember where), and I knew it was perfect. Bethany used to teach science to middle schoolers (and is the most naturally curious person I know), and James is a math nerd (he actually has a graduate degree in statistics).

This was a pretty easy project - I just used a couple of coats of craft paint for background color, printed the words from my computer, and transferred them to the canvas using black transfer paper and a black sharpie.
Then I saw this saying on an art print (I can't remember where), and I knew it was perfect. Bethany used to teach science to middle schoolers (and is the most naturally curious person I know), and James is a math nerd (he actually has a graduate degree in statistics).

This was a pretty easy project - I just used a couple of coats of craft paint for background color, printed the words from my computer, and transferred them to the canvas using black transfer paper and a black sharpie.
making a homemade journal.
I created another journal, this one slightly different than the last one, and this time, I thought I'd write up a quick tutorial on how I made it.

What you'll need:

a board book (I found this one at a thrift store for less than a dollar)
scrapbook paper for the cover and dividers
solid-colored paper for the journal pages
coordinating ribbon
book rings (also called binder rings) (you'll need 2)
How to make it:

1. Take the board book apart.
I just cut each "page" off using scissors, then trim it straight if necessary. You can easily get several make several journals out of one book.

2. Decorate the cover and any dividers with scrapbook paper.
You can make this as simple or as fancy as you like. I like using packs of patterned papers because that way, they come already coordinated, then I use a couple of solid pieces as mats.
You could trace the board book page onto the paper, cut it out, then attach it with Modge Podge, but I find it easier to trim the paper after its already been glued down. Once both sides are dry and trimmed, I touch of the edges where I need to.
I'm a huge fan of quotes, so this journal is full of them. I use Microsoft Publisher for laying out things like this - I can figure out how big I want the quote page to be, create a text box in the size I need, then adjust the font and font size as I see fit.

For this journal, I actually did something a little different. I wanted to attach pieces of ribbon so the book could be tied shut. For each cover piece, I cut a piece of ribbon, placed it under the quote on the inside page, then wrapped it around to the cover. You'll want the trailing edge of the ribbon to be on the outside edge of the journal (the side that will open). Its kind of hard to explain, so it might not make sense at first - but it comes together in the end!

3. Create the journal pages.
This is the most tedious part of the process, but it also doesn't take much brain power once you figure out the dimensions, so I just go it while I watch TV. Depending on the size of your journal, you might be able to find pre-cut pages in the right size. After the pages are cut, I use a three-hole punch so I can make sure everything is spaced exactly the same. This is also where you can make the journal as thick as you want.

4. Punch holes in the covers and dividers.
Once the pages are cut to size with the holes punched in them, I use one sheet as a template for the where the holes need to be placed in the covers and dividers. I use a Martha Stewart screw punch (found here). The pages are thick, so it usually takes a few punches from both sides cover to get the holes punched completely through.

5. Assemble the journal.
Then, just put everything together! I've used ribbon to bind these in the past, but because I was using ribbon to tie the journal shut, I decided to use book rings instead. I bought mine at Office Max, but I would guess that they're available at almost any office supply store. They're not cheap, especially considering that I only needed two, but I'm sure I'll be able to use the rest in other projects.
So, here's the finished result again - I love the way it turned out!


Linking up to:

What you'll need:

a board book (I found this one at a thrift store for less than a dollar)
scrapbook paper for the cover and dividers
solid-colored paper for the journal pages
coordinating ribbon
book rings (also called binder rings) (you'll need 2)
How to make it:

1. Take the board book apart.
I just cut each "page" off using scissors, then trim it straight if necessary. You can easily get several make several journals out of one book.

2. Decorate the cover and any dividers with scrapbook paper.
You can make this as simple or as fancy as you like. I like using packs of patterned papers because that way, they come already coordinated, then I use a couple of solid pieces as mats.
You could trace the board book page onto the paper, cut it out, then attach it with Modge Podge, but I find it easier to trim the paper after its already been glued down. Once both sides are dry and trimmed, I touch of the edges where I need to.
I'm a huge fan of quotes, so this journal is full of them. I use Microsoft Publisher for laying out things like this - I can figure out how big I want the quote page to be, create a text box in the size I need, then adjust the font and font size as I see fit.

For this journal, I actually did something a little different. I wanted to attach pieces of ribbon so the book could be tied shut. For each cover piece, I cut a piece of ribbon, placed it under the quote on the inside page, then wrapped it around to the cover. You'll want the trailing edge of the ribbon to be on the outside edge of the journal (the side that will open). Its kind of hard to explain, so it might not make sense at first - but it comes together in the end!

3. Create the journal pages.
This is the most tedious part of the process, but it also doesn't take much brain power once you figure out the dimensions, so I just go it while I watch TV. Depending on the size of your journal, you might be able to find pre-cut pages in the right size. After the pages are cut, I use a three-hole punch so I can make sure everything is spaced exactly the same. This is also where you can make the journal as thick as you want.

4. Punch holes in the covers and dividers.
Once the pages are cut to size with the holes punched in them, I use one sheet as a template for the where the holes need to be placed in the covers and dividers. I use a Martha Stewart screw punch (found here). The pages are thick, so it usually takes a few punches from both sides cover to get the holes punched completely through.

5. Assemble the journal.
Then, just put everything together! I've used ribbon to bind these in the past, but because I was using ribbon to tie the journal shut, I decided to use book rings instead. I bought mine at Office Max, but I would guess that they're available at almost any office supply store. They're not cheap, especially considering that I only needed two, but I'm sure I'll be able to use the rest in other projects.
So, here's the finished result again - I love the way it turned out!


Linking up to:
Handmade Holidays at Just A Girl
Feature Yourself Friday at Fingerprints On The Fridge
Crazy Christmas Crafter at I Heart Naptime with Chocolate Sundaes
Crazy Christmas Crafter at I Heart Naptime with Chocolate Sundaes
Get Your Craft On at Today's Creative Blog
reminders of the undone.
Sometimes it feels like everywhere I look, I see reminders of things that aren't done. There are dishes in the sink, dirty clothes on the floor, clean clothes in the laundry basket AND the dryer, mutant weeds all over the flower beds, and tools and materials for craft projects spread out all over the table.
My usual reaction to something like this is to start writing things down. Do a mind dump and get everything out on paper, starting making to-do lists to plan how I'm going to tackle everything. But the reminders seem to come faster than I can process them - this is the part where I start to get overwhelmed. And not in a good way - this is the kind of overwhelmed where I want to bury my head in the sand and pretend the problem doesn't exist.
With the mind dump and to-do lists not really helping, its time to move on to the next strategy - a grand purge. With a deadline. My hope is that clearing out the physical clutter will not only make it easier to finish the things that I need to, but will help to create the mental space I need to be productive, instead of overwhelmed.
This idea was actually inspired by a post from Young House Love (and a desire to continue to work on clearing out the clutter in my house). Their initial goal was to get rid of 100 things before moving in December. Just a few days later, they posted the results - 222 things gone.
I'm using my parents' Thanksgiving visit as my deadline, giving me just over a week to finish, and I'm keeping a growing list of my refrigerator to help me stay motivated. I'll post my results next week.
My usual reaction to something like this is to start writing things down. Do a mind dump and get everything out on paper, starting making to-do lists to plan how I'm going to tackle everything. But the reminders seem to come faster than I can process them - this is the part where I start to get overwhelmed. And not in a good way - this is the kind of overwhelmed where I want to bury my head in the sand and pretend the problem doesn't exist.
With the mind dump and to-do lists not really helping, its time to move on to the next strategy - a grand purge. With a deadline. My hope is that clearing out the physical clutter will not only make it easier to finish the things that I need to, but will help to create the mental space I need to be productive, instead of overwhelmed.
This idea was actually inspired by a post from Young House Love (and a desire to continue to work on clearing out the clutter in my house). Their initial goal was to get rid of 100 things before moving in December. Just a few days later, they posted the results - 222 things gone.
I'm using my parents' Thanksgiving visit as my deadline, giving me just over a week to finish, and I'm keeping a growing list of my refrigerator to help me stay motivated. I'll post my results next week.
simple magnet board.
When I saw the Dare to Do It Yourself party series from Kim at Newly Woodwards, I thought it would be a fun way to challenge myself for the next few weeks, so I planned to participate as I had.

The theme for the first week is Thanksgiving. To be honest, I'm actually not a huge fan of Thanksgiving - I don't get excited about turkey or most other traditional side dishes, I'm almost never in my own home for the holiday, and I just don't like the color scheme (I know that is a ridiculous reason to not like a holiday). I'd rather move on to celebrating and preparing for Christmas.
So - I tried to come up with a project that was (1) simple and easy to make, (2) inexpensive and preferably using things I already had on hand, and (3) versatile enough to use for other holidays or even everyday life.
I decided to make a simple magnet board for a narrow stretch of wall in my living room. I've actually been looking for an old shutter or two to hang there for a while, in order to create something like this, but since I couldn't find a shutter, I went with what I had.
I found a scrap piece of plywood in the garage that was the perfect fit, and painted it with two coats of magnetic primer. It should probably have three coats, because it really can't hold up anything even remotely heavy, but it works for now.

I used another scrap piece of wood to create the sign. I wanted to use paints I already had, so I tried to mix red and yellow to get a nice shade of orange. No luck - the mixed paint was bright pink instead - so I mixed a dark brown espresso color with an antique white, and ended up with color that is actually pretty similar to my wall color.
After painting, I added color of letter stickers I already had and placed them somewhat haphazardly (so I didn't have to worry about a straight line). When I was finished, the word looked a little off center, so I added the period to balance it out a bit. Then I drilled holes in the sign and tied it with extra ribbon to hang it.

The last step was to create the magnets themselves. I added magnet strips to a few clothespins and clipped different things I am thankful for. I'm planning to keep adding to it for the next few weeks.

I can think of quite a few ways to use it in the future:
The theme for the first week is Thanksgiving. To be honest, I'm actually not a huge fan of Thanksgiving - I don't get excited about turkey or most other traditional side dishes, I'm almost never in my own home for the holiday, and I just don't like the color scheme (I know that is a ridiculous reason to not like a holiday). I'd rather move on to celebrating and preparing for Christmas.
So - I tried to come up with a project that was (1) simple and easy to make, (2) inexpensive and preferably using things I already had on hand, and (3) versatile enough to use for other holidays or even everyday life.
I decided to make a simple magnet board for a narrow stretch of wall in my living room. I've actually been looking for an old shutter or two to hang there for a while, in order to create something like this, but since I couldn't find a shutter, I went with what I had.
I found a scrap piece of plywood in the garage that was the perfect fit, and painted it with two coats of magnetic primer. It should probably have three coats, because it really can't hold up anything even remotely heavy, but it works for now.

I used another scrap piece of wood to create the sign. I wanted to use paints I already had, so I tried to mix red and yellow to get a nice shade of orange. No luck - the mixed paint was bright pink instead - so I mixed a dark brown espresso color with an antique white, and ended up with color that is actually pretty similar to my wall color.
After painting, I added color of letter stickers I already had and placed them somewhat haphazardly (so I didn't have to worry about a straight line). When I was finished, the word looked a little off center, so I added the period to balance it out a bit. Then I drilled holes in the sign and tied it with extra ribbon to hang it.
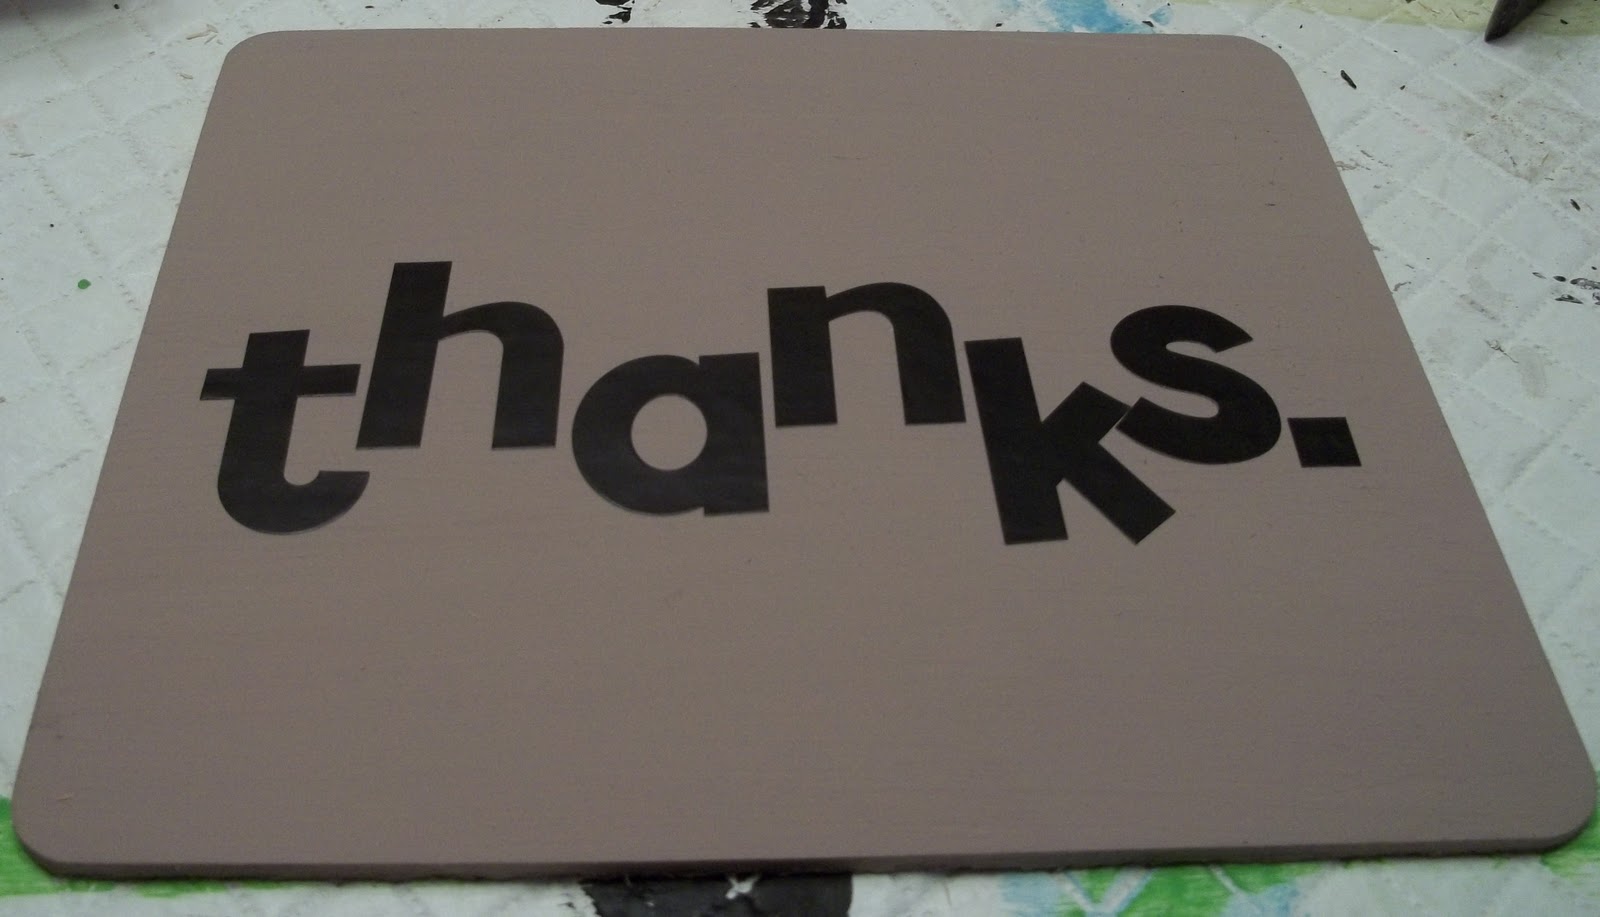
The last step was to create the magnets themselves. I added magnet strips to a few clothespins and clipped different things I am thankful for. I'm planning to keep adding to it for the next few weeks.

I can think of quite a few ways to use it in the future:
- As a Christmas advent calendar - just change up the sign (or even use the back of the current one).
- For baby showers (I throw a lot of those) - just change the sign and clip up photos of the guest of honor, or ask guests to add notes for the new mom
- As a photo or memento display
sunday inspiration - the christmas edition.
One of my life mottos is that its never too early to start thinking about Christmas (though even I was a little surprised to see a fully decorated tree at the entrance to Walmart a couple weeks ago).
I love advent calendars - I think they're a great way to build up the anticipation of Christmas? And all the better when you can tie it into the real reason we celebrate. This version costs $299 at Pottery Barn, but it wouldn't be difficult to create the same thing for much less.

This is another great idea for an advent calendar, and a good reminder that Christmas decorations come in all kinds of colors. If I cared to sew, I would love to make one for my home - maybe I'll come up with a no-sew version.

I've seen a ton of different versions of subway art, but this Christmas one is great. I especially like the finish on it - its decoupaged onto wood, then distressed with a gel stain.

These tinsel-filled ornaments are so simple, but can you imagine how great they would look on a tree with tons of Christmas lights?

These Christmas canvases just might be one of my favorite ideas - because they're so simple, and yet would be so easily adapted to lots of other looks. The four-part black and white combo is really cool.

-- 1 --
I love advent calendars - I think they're a great way to build up the anticipation of Christmas? And all the better when you can tie it into the real reason we celebrate. This version costs $299 at Pottery Barn, but it wouldn't be difficult to create the same thing for much less.

-- 2 --
This is another great idea for an advent calendar, and a good reminder that Christmas decorations come in all kinds of colors. If I cared to sew, I would love to make one for my home - maybe I'll come up with a no-sew version.

-- 3 --
I've seen a ton of different versions of subway art, but this Christmas one is great. I especially like the finish on it - its decoupaged onto wood, then distressed with a gel stain.
-- 4 --
These tinsel-filled ornaments are so simple, but can you imagine how great they would look on a tree with tons of Christmas lights?

-- 5 --
These Christmas canvases just might be one of my favorite ideas - because they're so simple, and yet would be so easily adapted to lots of other looks. The four-part black and white combo is really cool.
haley's wall art.
My good friends Heather and Nick just adopted their little girl, Haley Reese. She is unbelievable tiny and so beautiful.
A long time ago, when they started moving through the long adoption process, I told Heather that when they they brought their baby home, I was going to make something for them. I didn't know quite what it would be, only that it would include the following poem:
Heather knew exactly what she wanted - she asked me to create flower collages, like this and this, but in the colors of Haley's nursery. She picked out the paper and ribbon, and I painted the background of the canvases the same color as the lower half of the nursery walls. Rather than free-handing the words, I printed them out using a handwriting font (downloaded for free to dafont.com) and transferred the words using this method.
Here's the final product:

Heather did a great job picking the colors - they look absolutely adorable in Haley's room.
A long time ago, when they started moving through the long adoption process, I told Heather that when they they brought their baby home, I was going to make something for them. I didn't know quite what it would be, only that it would include the following poem:
Not flesh of my flesh
Nor bone of my bone
But still miraculously my own.
Never forget for a single minute
You didn't grow under by heart
But in it.
~ Fleur Conkling Heyliger
Nor bone of my bone
But still miraculously my own.
Never forget for a single minute
You didn't grow under by heart
But in it.
~ Fleur Conkling Heyliger
Heather knew exactly what she wanted - she asked me to create flower collages, like this and this, but in the colors of Haley's nursery. She picked out the paper and ribbon, and I painted the background of the canvases the same color as the lower half of the nursery walls. Rather than free-handing the words, I printed them out using a handwriting font (downloaded for free to dafont.com) and transferred the words using this method.
Here's the final product:

(Source: Heather, via Facebook)
Heather did a great job picking the colors - they look absolutely adorable in Haley's room.
what love really means.
I think I love every song from JJ Heller that I've ever heard.
Who will love me for me?
Not for what I have done or what I will become
Who will love me for me?
‘Cause nobody has shown me what love, what love really means
Who will love me for me?
Not for what I have done or what I will become
Who will love me for me?
‘Cause nobody has shown me what love, what love really means
he is not silent.
For a couple of months now, I've been asking God for guidance, for specific instructions.
And so far, he has not answered.
This is a hard thing, to feel like God is silent, especially when you're seeking and longing so desperately for him to speak.
Until he reminded me, through the perfect song at the perfect time, that he has "been singing, always singing over me." Until I looked up from my own circumstances, and realized that all around me, he is speaking and moving and answering prayers.
Until I realized that just because he's not answering my question, that doesn't mean that he is silent.
And so far, he has not answered.
This is a hard thing, to feel like God is silent, especially when you're seeking and longing so desperately for him to speak.
Until he reminded me, through the perfect song at the perfect time, that he has "been singing, always singing over me." Until I looked up from my own circumstances, and realized that all around me, he is speaking and moving and answering prayers.
Until I realized that just because he's not answering my question, that doesn't mean that he is silent.
When you're faithful and you trust God even when it seems like he's not there, you discover what I think is one of the most incredible truths in all of Scripture, and that is that God is powerfully present even when he seems to be apparently absent. You have to put your faith in God's identity and not his activity.
Subscribe to:
Posts (Atom)