I finally finished my recipe goal for the year - here are numbers 22-25.
Slow cooker chicken with salsa and cream cheese
This is a variation on salsa chicken tacos - a recipe I make frequently because its easy and so versatile. Sometime ago I saw a version that included cream cheese, though I can't remember where. It wasn't bad, but I'm not sure I liked it enough to make it again.
Grilled stuffed zucchini
I loved this - it was so good that I've already made it again twice, including a veggie version with brown rice instead of the Italian turkey sausage. I've also used leftover filling to stuff bell peppers, which was also amazing.
Bacon-wrapped green beans
I had some green beans in the refrigerator that I needed to use, and was kind of bored at the idea of just steaming them like I usually do. So, I wanted to try this recipe for bacon-wrapped green bean bundles - except all I had was turkey bacon, and I didn't have the rest of the ingredients for the sauce, so I skipped that part. Very good, so next time I'm going to actually try the way the recipe.
Red beans and rice
I'm undecided on this one. I know that red beans and rice is one of those traditional regional dishes that comes with really strong opinions on the way its supposed to be made. It was okay - not bad, but also not amazing. So I'm kind of wondering if I'm just not wild about red beans and rice in general, or if it was just this version.
For more recipes and reviews, see part 1, part 2, part 3, and part 4.
funny paint guy.
I stopped by Lowes tonight to pick up paint for the dresser (goal #6) and some sample colors for the front door (stripping it isn't work out the way I was hoping). While he was mixing everything, the guy at the paint counter chatted with me about the projects I'm working on. I asked him about recommended finishes (eggshell, satin,semi-gloss) for exterior doors, and he reminded me that when I buy paint for the front door, I need to let them know what I'm using it for.
Me: I know, I'll need exterior paint for the door.
Funny paint guy: Okay, so you're not just a dumb blonde.
Me: Nope, I painted that on, too!
Me: I know, I'll need exterior paint for the door.
Funny paint guy: Okay, so you're not just a dumb blonde.
Me: Nope, I painted that on, too!
charging station.
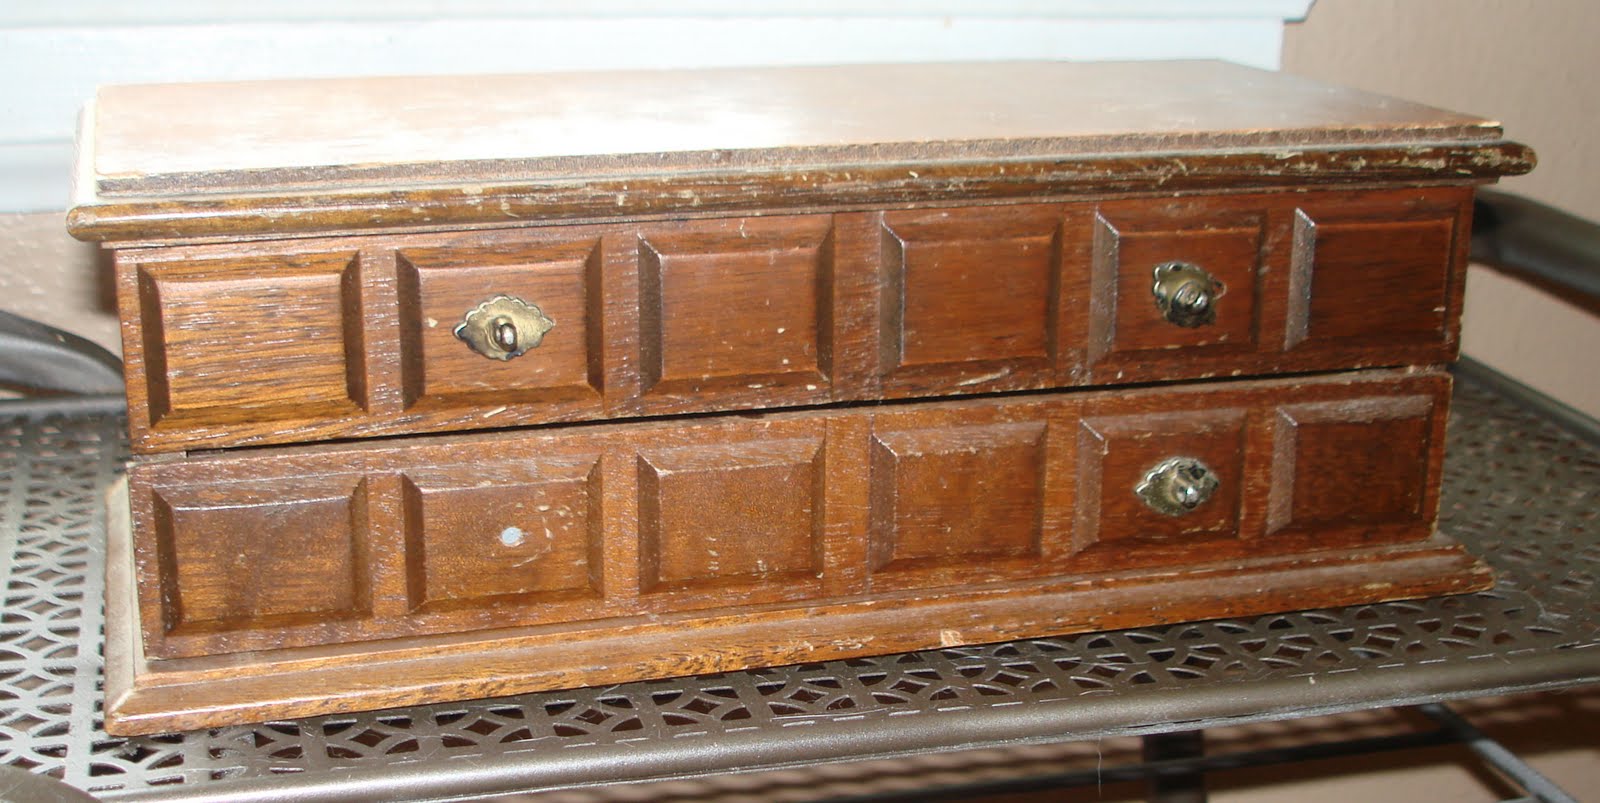
Since I first saw this jewelry box turned charging station, I've been keeping my eyes opened for the right box to do something similar. Here's the before :


The first thing I did was to rip out the lovely yellow velour dividers (even before I took the photos), then I used the end of a flathead screwdriver to pull off the rest of the lining. I primed and painted the whole thing white, then distressed it and added a dark stain on top as a glaze (the distressing shows up much better in person).

I cut a hole in the back using a large drill bit, then lined the sides with pieces of patterned scrapbook paper. At first, I planned to just leave the drawer, but then decided that it wasn't necessary and would get in the way, so I cut off the front of the drawer and used Liquid Nails to glue it in place.
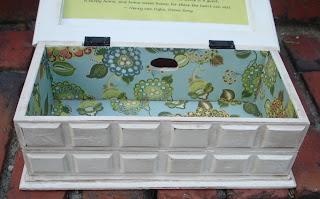
I added the quote to the inside cover, partly because I like it and have always wanted to have it somewhere in my home, and partly because I think its funny that a charging station contains a quote about resting.

This is what it looks like inside the house, with the power cord and all my chargers. I'm actually using it here to charge my camera battery and my cell phone, which is why its open - when its not in use, everything fits well enough to close.


I added the quote to the inside cover, partly because I like it and have always wanted to have it somewhere in my home, and partly because I think its funny that a charging station contains a quote about resting.

Every house where love abides, and friendship is a guest,
is surely home, and home sweet home; for there the heart can rest.
~ Henry van Dyke, Home Song
This is what it looks like inside the house, with the power cord and all my chargers. I'm actually using it here to charge my camera battery and my cell phone, which is why its open - when its not in use, everything fits well enough to close.

gabon. and balance.
A couple months ago, I mentioned that my sister and I had just registered for a short-term missions trip to Gabon, Africa. We leave in a little less than two months, and we're ankle-deep in planning. We've written and mailed out support letters, we're looking into visas and anti-malarial meds, and we've started shopping for all the little things we need.
I am so excited about our trip, that I'm actually struggling to make sure that the next two months aren't all about Gabon, even while we're doing all the necessary prep work. There are a lot of good things going on in between now and the day we leave, and I don't want to be so focused on the future that I miss the present.
I often find myself trying to achieve this balance, sliding from one extreme to the other. I don't want to spend my life planning to live and never living, and I've learned the hard way that my plans aren't always God's plans. I don't want to slide through life flying by the seat of my pants, either - constantly reacting because I failed to put in the work now. Its not always an easy line to walk.
Either way, as I strive to make sure I'm living today well, if you'd like to read more information about our trip, including the reasons we're going, you can view our support letter here (page 1 and page 2). We'd love your prayers!
.jpg)
narnia.
I'm a huge fan of C.S. Lewis' Chronicles of Narnia - and the crazy part is, I became a fan as an adult. I remember reading The Lion, the Witch, and the Wardrobe in elementary school, and enjoying it, but its the allegory to God's story that captivates me the most.
I just found out (thanks to this post) that the newest movie adapted from the series, The Voyage of the Dawn Treader, is set to be released on December 10, and I can't wait.
Watch the trailer here:
I just found out (thanks to this post) that the newest movie adapted from the series, The Voyage of the Dawn Treader, is set to be released on December 10, and I can't wait.
Watch the trailer here:
10 things i learned from my dad.
In honor of my dad, on Father's Day, I thought I post just a few of the lessons I've learned from him.


- When its a good friend's house, you don't have to knock.
- The best way to practice hospitality is just to be yourself.
- There's a pretty cool world out there, and it's worth seeing.
- Sometimes the value of a thing is actually more about the story behind it.
- It's important to love with your actions - it's also important to say the words.
- God is far bigger than doctors and ouija boards, and anything else really.
- You don't just go to church on Sunday morning, you get involved.
- There's a lot of joy to be found in something you made yourself.
- Lots of relationships are built, and maintained, over a meal.
- Nothing can cheer you up like a hug.

Bermuda, 1994
testing paint finishes.
The other frame I've been working on (you can see the two others here) is for a surfboard print I bought for my bedroom. Three years ago. Which is kind of embarassing.
I used a couple of rustic pine 1x2 furring strips, and this plan from Knock-Off Wood (which is a crazy-inspiring site, and one of the main reasons I wanted to buy a nailer and compressor for my birthday).
So - this was one of those frustrating projects where nothing seeemed to go right. I won't go in to the details, except to say that there was absolutely nothing wrong with the plans - I just made several mistakes. Luckily, 1x2s are really cheap - and now I have scraps for future projects (or even more, smaller frames).
So, here are the options:

By the way, these are a lot less subtle in person. At least, I think so.


I used a couple of rustic pine 1x2 furring strips, and this plan from Knock-Off Wood (which is a crazy-inspiring site, and one of the main reasons I wanted to buy a nailer and compressor for my birthday).
So - this was one of those frustrating projects where nothing seeemed to go right. I won't go in to the details, except to say that there was absolutely nothing wrong with the plans - I just made several mistakes. Luckily, 1x2s are really cheap - and now I have scraps for future projects (or even more, smaller frames).
The tricky part has been deciding on what finish I want to use. I knew I wanted something basically white and rustic - but not barn rustic, more beach rustic. I looked at a lot of information online and came up with a few different possibilities, but couldn't decide which to try. Until it occurred to me to actually test them one of those scrap pieces of wood. (I know, sometimes my problem-solving abilities astound even me).
So, here are the options:

By the way, these are a lot less subtle in person. At least, I think so.
- A whitewash finish, using watered-down white primer (using the instructions here)
- A dark stain, followed by a coat of white paint on top and sanded off
- A coat of white paint, distressed, then dark stain on top as a kind of glaze

Option 2 didn't really work the way I expected. I started by applying the stain, letting it sit for a while, then wiping it off. After a couple more hours, I rubbed the edge of a candle along the some of the edges (I read that somewhere as a trick for distressing - the paint isn't supposed to adhere to the candle wax, meaning those are the areas that are easily sanded off). Then, I added a couple of coats of white paint. Once everything was dry, I started sanding the edges - and the stain sanded right off, too. Which wasn't really the look I was going for.
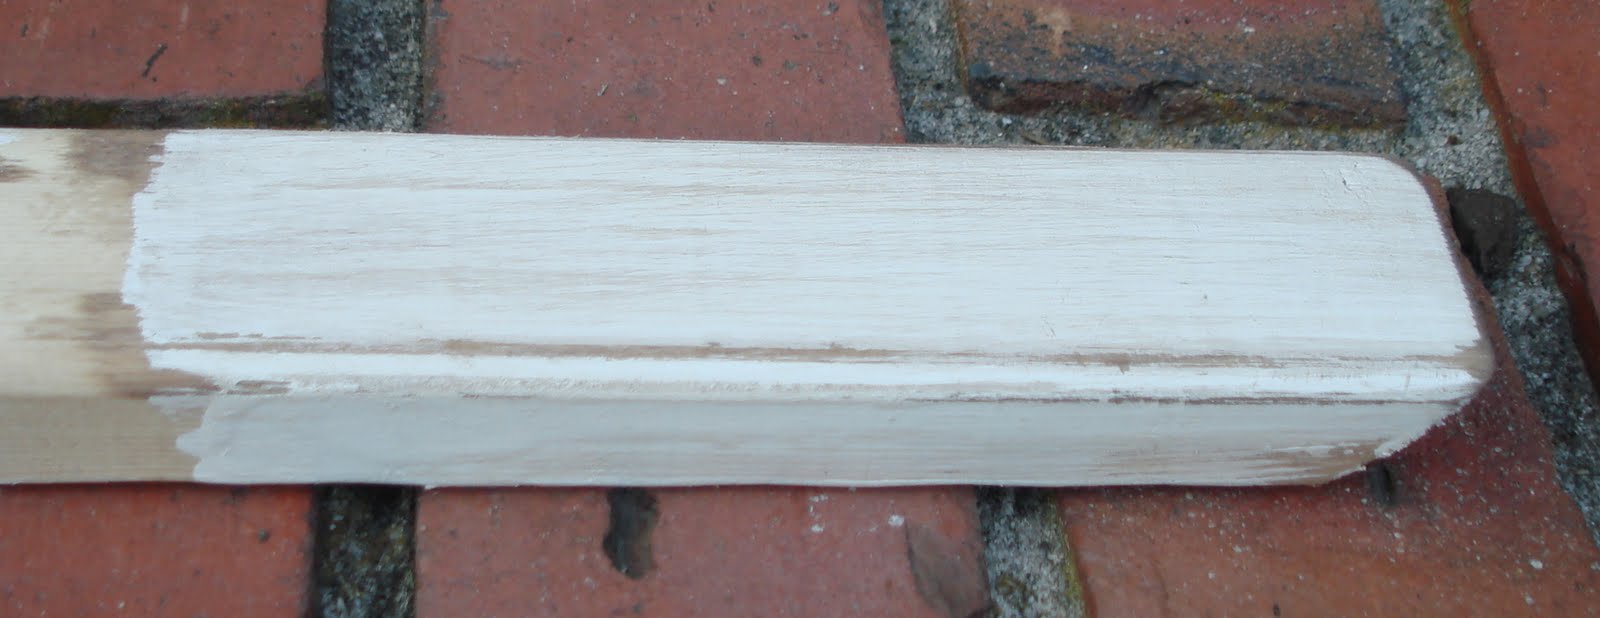
I liked the results of option 3, but when I held my test board up in my room with the print, I didn't really like it. I have another project in mind where I think this finish will look great. (To do this, I applied two coats of white paint, sanded off the corners, then painted on a bit of stain and wiped it immediately off almost right away.)

I liked option 1 the best - so that's what I decided to go with. I'm still not totally sold on it - the color is a little too white, I think, especially with everything else in the room. But I'm going to live it for a while until I decide for if I want to change it. At least its finally hanging up in my bedroom!

project inspiration (vol 1).
Just a few of the projects I've seen lately that are inspiring me:

DIY garden chandelier from Ecologue - I'm trying to convince my sister to let me create something like this for her outdoor reception in August - I think it would look amazing hanging above the railing on her deck.

Old window turned display frame from 71 toes - I already have a thing for making stuff from old window frames (exhibit a, b, and c), and I'd definitely like to do this with a huge window I have in the garage. Choosing photos will be the hard part.

Front door quote from Apartment Therapy - I've been thinking of quote ideas for my front door, whenever I figure out what I'm actually going to do with it. Love this one!

Hidden cabinet inspiration board from Young House Love - I'm definitely doing this, as I think I already have all the pieces I would need at home!

Greenhouse window from Martha Stewart - One of the few things I regret about renovating my kitchen 4 years ago is that I didn't plan for a deeper window sill (and the gooseneck faucet that I love makes adding one impossible). Something like this might would be a great way to add space for growing herbs in the window.
DIY garden chandelier from Ecologue - I'm trying to convince my sister to let me create something like this for her outdoor reception in August - I think it would look amazing hanging above the railing on her deck.
Old window turned display frame from 71 toes - I already have a thing for making stuff from old window frames (exhibit a, b, and c), and I'd definitely like to do this with a huge window I have in the garage. Choosing photos will be the hard part.
Front door quote from Apartment Therapy - I've been thinking of quote ideas for my front door, whenever I figure out what I'm actually going to do with it. Love this one!
Hidden cabinet inspiration board from Young House Love - I'm definitely doing this, as I think I already have all the pieces I would need at home!
Greenhouse window from Martha Stewart - One of the few things I regret about renovating my kitchen 4 years ago is that I didn't plan for a deeper window sill (and the gooseneck faucet that I love makes adding one impossible). Something like this might would be a great way to add space for growing herbs in the window.
frames for the dining room.
Two of the things I wanted to finish this weekend were the frames for the dining room.
I've had these two prints up for ever - one I bought on Arbat in Moscow in February 2009 (I made a simple frame for it here), and the other is a view of Baker Park from well-known (at least in Frederick) artist Harry Richardson. I purchased the latter while at the Maryland Christmas Show with my mom, sisters, and nephew last November.
With Victor's guidance, I picked up select pine 1x2s at Home Depot - its a lot smoother than rough pine, but provides a smoother finish when staining than oak. After cutting each piece to size, I attached them using the nail gun I bought with birthday money.


finishing.
The theme for this weekend is finishing:
- Finishing the frames I made for my dining room.
- Finishing stripping the back of the front door.
- Finishing turning a thrift store jewelry box into a charging station.
- Finishing the Bridge Kids lesson plans for June.
- Finishing the dining room window treatments.
- Finishing and mailing our support letters for Gabon.
kristin's journal.
My friend Kristin is graduating from high school tomorrow, and I wanted to make her something special for a gift.
We've spent a lot of time over the past year talking about taking risks, and moving outside of your comfort zone. Kristin has followed God's leading this year to do so many things that have scared her to death, but she's followed anyway, and learned so much about faith in the process.
I spent some time looking online for a journal or notebook that would speak to all of that. When I didn't have any luck, I decided to make my own - and this is the finished result!
I love how it turned out - even better than the picture I had in my head.

In addition to the cover, there are three dividers inside as well, each covered with a different piece of patterned paper. Most of the inside pages are blank, but the first page of each section has a quote that reminded me of Kristin.

I also added a pocket inside the front and back covers - the front has a little note from me to Kristin, and back containers several scrapbooking photo corners, in case she wants to add photos to some of the pages.
The best part? I used a children's board book I bought at the thrift store for the covers and dividers, thanks to this inspiration from Nap Time Journal on cheap chipboard albums. I just covered used a box cutter to carefully separate the pages, then covered the pictures of the Little Mermaid with scrapbook paper.
I'm so happy with the end result, and can't wait to give it to Kristin tonight!

Edited to add: I'm linking this up to Feature Yourself Friday.
Subscribe to:
Posts (Atom)